Take the Easy Test Road (Sometimes)
This file type includes high-resolution graphics and schematics when applicable.
I get it—life in the lab isn’t leisurely. Impending deadlines and unexpected time sinks always seem to pull you away from what you need to be doing. And, in the test-and-measurement field, we spend a lot of time telling you how to make the highest-quality measurement or how to test your device to the most stringent possible specifications. Today I’m going to sing a different tune. Sometimes, you can take the easy road and still get your job done.
Your testing with an oscilloscope will fall into one of two categories: qualitative testing and quantitative testing. Knowing which type of testing you’re doing will inform how you spend your time in the lab.
Qualitative vs. Quantitative Measurements
Balancing time and thoroughness in the lab can be difficult.Qualitative testing—think “qualify”
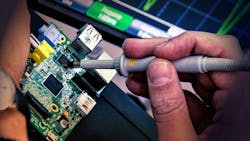
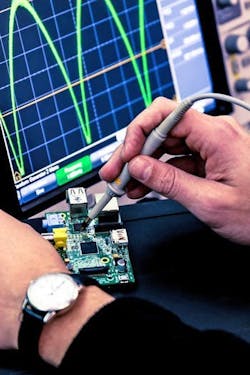
Qualitative testing is the off-the-cuff testing that you typically do when you’re debugging a design or poking around your board with probes to make sure everything’s working. Think “qualify” as functional or not. You don’t care so much about getting a great connection to your device or if your clock signal’s rise time is 10 ns or 12 ns. You just want to make sure that the clock is actually functioning.
Quantitative testing—think “quantify”
Quantitative testing is the type of testing we love to talk about in the test-and-measurement industry. It usually leads to you drooling over some fancy new gear that falls into the “if you have to ask how much, it’s too expensive” department.
However, that’s not always the case. If you’re doing quantitative testing it simply means that you care about the stats (think “quantify,” like stats/numbers). You do care about the difference between a 10-ns and 12-ns rise time because you need to hit the crucial “setup and hold” requirements of your receiver. Or, you care about the difference between a 5-V p-p signal and a 5.5-V p-p signal because your amplifiers might saturate.
So, before doing any testing of your device, you need to know which of these categories your work falls into. Once you know, you can evaluate the following considerations for yourself and decide how much they actually matter for the task at hand. Here are some pointers for things you should always do, sometimes do, and rarely do.
What You Should Always Do
Start from a known state
You never know for sure what the person before you did to that poor oscilloscope (or what you were thinking the last time you used it). Save yourself a lot of trouble down the road and always start from a known state. Hit the “default setup” button, or better yet, load your own custom setup so that you’re always starting from the same place.
Do a quick “spec check”
Make sure the oscilloscope and probe you’re using can handle the signals you’re testing.
• Bandwidth: If you’re looking at a 200-MHz square wave, your 200-MHz scope probably isn’t the best choice. You could probably get away with it for qualitative testing, but what you see on the screen will look nothing like your actual signal. The general rule of thumb is to make sure your system bandwidth is 5X your fastest digital signal and/or 3X your fastest analog signal.
Wait, did you see that? I said “system” bandwidth not “oscilloscope” bandwidth. As it turns out, your probe bandwidth and the method of connection both influence your test system’s bandwidth. Look near the end of the article “How to Pick the Right Oscilloscope Probe” for more info on how to calculate that. If you’re doing sensitive quantitative measurements, you want to be darn sure that you have ample system bandwidth or you’ll potentially get some misleading time-dependent measurements.
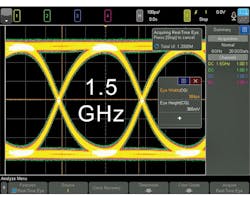
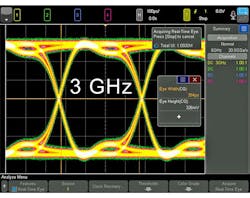
The same 1.2-GHz signal on a 3 GHz-bandwidth. Notice the difference that bandwidth makes for your measurements (Fig. 3).
• Probes: Always pick the right probes. It seems obvious, but the difference between a standard passive probe and a higher-end active probe is pretty significant. For qualitative testing, the standard passive probes included with the box are generally going to be fine assuming they deliver the needed bandwidth. But, for quantitative testing you really might want to consider something a little beefier. Probe specs like capacitive loading and device connectivity can dramatically affect your measurements. To learn more about probe specs you might want to consider, check out the article linked in the paragraph above.
What You Should Sometimes Do
Calibrate your gear
Is your test gear’s calibration up-to-date? If not, it’s probably not a big deal. But calibrated equipment does give you an assurance that your measurements are falling within a specified tolerance. If you’re doing qualitative testing, you will generally be able to debug your device without much trouble.
However, if you’re doing highly sensitive quantitative testing (like conformance testing or manufacturing-line testing), you want to use appropriately calibrated equipment. A number of different calibration certifications are out there, so make sure you choose the one that makes sense for your testing. Ultimately, if you have tight tolerances in your design, you want to make sure you’re not going to shoot yourself in the foot by being lazy with your equipment calibrations.
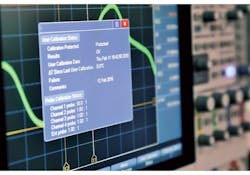
User calibration status is provided on a Keysight InfiniiVision 4000 X-Series oscilloscope (Fig. 4).
Turn off the lights (get out of a noisy environment)
Don’t underestimate your environment. Some of the cubicles here at Keysight have a built-in fluorescent light below some shelving units. More than one engineer has been duped into thinking that their design has an unusual noise profile when it was simply the light injecting the noise. Think about what fans, lights, and other equipment might be injecting noise into your system. For qualitative testing, it usually won’t impact you, but for quantitative testing it could send you down the wrong debug path.
Measure with cursors
Sure, it’s much easier to just turn on the scope’s automated measurements. But, every once in a while, you’ll find a glitch or anomaly that doesn’t quite fit any of those cookie-cutter measurements, forcing you to dig deeper. This is true for both qualitative and quantitative testing; follow your gut on this one, but don’t get snagged down the road because you didn’t explore that little ripple as much as you should have.
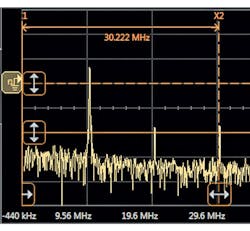
On this Keysight Infiniium S-Series oscilloscope, an FFT is measured with cursors (Fig. 5).
What You Rarely Need to Do
You need only consider these things if you’re doing quantitative testing. This could mean you’re doing verification and diagnostics on your manufacturing line, trying to track progress on noise reduction efforts, or running application-specific compliance testing.
Measurement statistics
Getting statistics on your oscilloscope measurements is a great way to track progress throughout the course of a project. Statistics give you insight into the reliability of your design by providing averages and standard deviations, as well as alerting you to potential worst-case scenarios. Finding your system’s bit error rate can be pretty useful, too. For best results, set up your measurements, start the testing, and go to lunch or that painfully long team meeting. When you come back, you’ll have a strong sample size to evaluate.
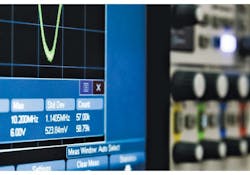
Shown is standard deviation of a signal after 58,000 measurements on an InfiniiVision 6000 X-Series oscilloscope (Fig. 6).
Mask testing
This is another good set-it-and-forget-it test scenario. Define a mask with acceptable tolerances. Go home for the evening or the weekend. When you come back, you should have a good idea of how reliable your system is, because you were able to run a few billion (or few trillion) tests.
Getting the Job Done
Ultimately, you can read as many advice articles as you want, but at the end of the day, you have to get your job done right. This means making tradeoffs in your design and in how you spend your test time. Sometimes you can save time by taking the easy road, and sometimes you can’t.
This list is by no means comprehensive, but should give you some food for thought the next time you don your lab coat. If you have any other test tips you’ve picked up or any topics you’d like me to cover, I’d love to hear them in the comments below!
Happy testing!
About the Author

Daniel Bogdanoff
Oscilloscope Product Manager
Daniel Bogdanoff is the Product Manager for the InfiniiVision series of oscilloscopes at Keysight Technologies. He graduated from Texas A&M with a degree in electrical engineering. In his spare time, Daniel enjoys whitewater kayaking, mountain biking and playing various musical instruments.
