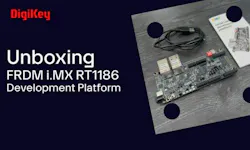
Fast Delivery DigiKey customers in the United States can choose from a wide range of fast, reliable delivery options, with shipping rates starting as low as $4.99. Payment Types Payment in Advance by Wire Transfer Marketplace Product More Products From Fully Authorized Partners Average Time to Ship 1-3 Days. Please see product page, cart, and checkout for actual ship speed. Extra Ship Charges May Apply VideoLibrary Video Library > NXP FRDM i.MX RT1186 Development Platform - Unboxing | DigiKey NXP FRDM i.MX RT1186 Development Platform - Unboxing | DigiKey We take a look at the FRDM i.MX RT1186 Development Platform from NXP, a cost-effective development board for prototyping PLCs, remote IOs, motor control, and other industrial automation applications. Inside the box, you’ll find i.MX RT1186 FRDM board, a quick start guide, and a USB-C cable. The board is based on the i.MX RT1180 crossover MCU that combines real time control, Gigabit TSN and EtherCAT industrial networking, and advanced security, all on a single chip. In this demo we’re going to import and run a project in VS Code using the MCUXpresso for VS Code extension , then use the MCUXpresso Config Tools to make some changes to that project. Plug the board in using the USB-C cable. The board has two USB-C ports. Use the one on the left side labeled DEBUG USB. Follow the instructions in the getting started guide to install and setup all of the necessary software. In the MCUXpresso Extension in VS Code, select Import Example from Repository, and import the rgpio_led_output_cm33 example project, then build and debug, and the RGB LED will blink. To change which GPIO is being used to control the LED blinking, right-click on the project and select Open with MCUXpresso config tools. In the Pins view, you can toggle filters to find available pins to select a different GPIO for the RGB LED. In this case, I’ve selected D2, which is IO 20. Set the pin as output, then click update code to generate new pin_mux C and header files. In rgpio_led_output.c, we need to define a macro for the LED BLUE pin and change the code to use this pin. Then build and debug to run the updated code. With the included examples and MCUXpresso tools, it’s easy to get started on your own project. 6/3/2026 2:31:20 PM 60 - Immediate i.MX RT1180 Crossover MCUs The NXP i.MX RT1180 crossover MCU architecture facilitates communication bridging between existing systems and future Industry 4.0 applications. Need Help? Thank you! Keep an eye on your inbox for news and updates from DigiKey! Please enter an email address I agree to receive marketing emails from DigiKey. I understand that I can withdraw consent at any time. Please review our Privacy Notice . Please accept the checkbox Subscribe Information Contact and support