The Engineer's Workbench: Part 1
What you'll learn:
- What is the perfect workbench?
- How quick can one be set up?
- How the workbench impacted Cabe's life?
All of history's greatest engineers had one thing in common: They all had workbenches.
We all focus on the latest dev board, sensor, and test equipment as the way forward, technologically. The latest device is usually the case. But none of that was made without putting the parts and design on a surface.
The engineer's workbench is an extension of the engineer themselves. It's a place to lay out all your ideas, your designs, your whole process. It's your testbench. It's your prototyping setup. It's where you run your feasibility study. It's where you might eat lunch. It's you.
Searching for the Perfect Workbench
For decades, I've been searching for the perfect workbench.
Here's a timeline of my benches (can't believe I have a timeline):
- I had a hardwood dinner table that I sat at for quite some time. It went with me to different shop locations.
- I had a bunch of standing tables I made from random large wood surfaces, like old doors, old desks, and random plywood.
- I added wheels to all my standing desks, so that I could be dynamic with what I was doing. Move to where I needed to be.
- Then I got a large conference table. The surface was amazing. Biggest surface yet. I could sit at it and lay out whatever I was working on. Everything I needed to work on. I had room to spare. Soon, this was the only place I worked. But, I had to sit at it. I looked at my rolling standing desks, wishing for something more.
Before moving on, do you want to see that conference table and the rolling ones? I'm using the conference table while demonstrating the blowout candles I made for Arduino's birthday. In the background, you can see one of the makeshift rolling tables. I think that one is an old door.
Now here we are today.
The answer was right in front of me
It was obvious when I added all of those timeline generations. I wanted a hardwood sit-stand conference table that I could roll around.
Then UPLIFT Desk strolled into my life, saying, "We've had that all along. Right this way, my engineer friend."
I clicked through UPLIFT Desk's configurator, selecting literally everything I could dream of in a workbench. When I saw it all, I just leaned back and said, "Wow."
- First, I chose a conference table. I selected the size of 80 × 30 inches, just about the same size as my previous conference table. The main difference, my original one was oval-shaped. The UPLIFT Desk was a rectangle. I like this better.
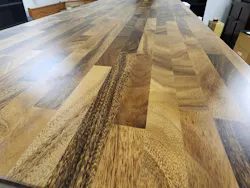
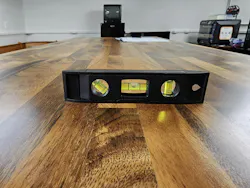
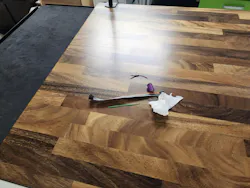
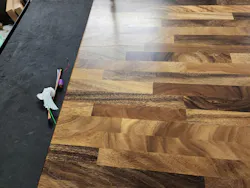
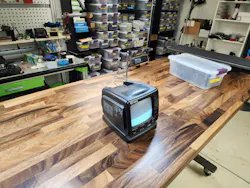
- I chose a hardwood surface, the saman wood butcher block top. I read that saman, out of all the hardwoods, deals with scratches, scrapes, and dents best. I selected no grommets. I didn't want big holes in the surface.
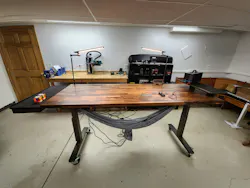
- Of course, I chose the stand/sit motorized base. This could take the workbench very low to the ground and almost above my head.
- For the desk base, I added heavy-duty casters with locks on each. At my shop, all my rolling standing desks had a hodgepodge of locking and free wheels. UPLIFT Desk's industrial wheel is a step above everything I have. The speed of the locking mechanism is great, too.
There you go. The perfect workbench was assembled. But I didn't stop making it more awesome.
- I added two clamp-on adjustable lights, the LED desk lamp E7. The worst thing about any table/bench is never having enough light on it. Or at least on what you're looking at.
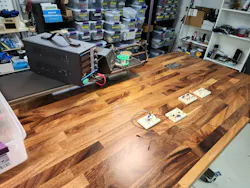
- I added a movable raised shelf. Mainly thinking about keeping my tools like power supplies, O-scopes, off the bench surface. Freeing up the space.
- I installed a movable AC plug with USB power. I added the wood garnish to match the desk. The one vanity accessory.
- I added the 8-outlet mountable surge protector for underneath the bench surface. You always need more plugs.
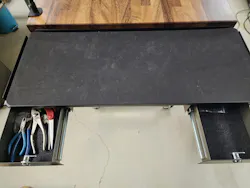
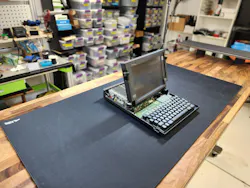
- I installed two desk extension trays at either end, adding even more space. The trays sit lower than the bench surface. I thought these would make a place to sweep off any debris. Or, maybe I might need more space.
- I added the clamp-on microphone arm. I figure I might be able to use that for a camera mount for recording project builds or operation.
- I added a couple of under-the-bench-mounted drawers for tools or whatever.
- I got an under-the-desk mounted PC tower platform, too. But, later, I thought the only reason I would do that is if I added a 3D printer or a CNC machine to the table. But, in retrospect, I think those types of machines should have their own dedicated table or space.
- I also got a file cabinet I can sit on and roll around as a mobile chair with more space for tools and such.
- And I got a larger rolling file cabinet for everything else. With the wood panels swapped out on the front, it really matches the aesthetic of the workbench itself. I've been so used to having a mess of different workshop surfaces, I never once thought I could have it all look good as well.
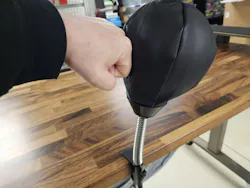
- I added that clamp of punching bag — the desk knockout. Kind of a novelty.
- And since I could raise it up so high, I had to get the under-mounted hammock!
The Assembly
Assembly was easy.
UPLIFT Desk showcased that a desk could be assembled in 4 minutes and 37 seconds.
I decided I would attempt to beat their record.
And I did, by 16 seconds, on an 80-in. desktop! See below.
Also, I have to figure out how to make a better sped-up video.
The Setup and Changes
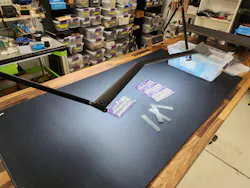
After adding the accessories, I decided that I didn't need the 2x desk extension trays. One would be good enough. In a twist, I thought having both on the table made it too big. That also opened up some different positions for the clamp of accessories.
Placing the raised shelf at the end or side is useful.

Modifications
You know, as an engineer, you always want to mod things.
I will admit one thing. I didn't attach all of the accessories I selected. I had a few under-the-table mounted drawers. To mount them, I would have to drill holes in the underside of the saman wood top. I just couldn't do it. I didn't want to drill into that beautiful butcher block.
Instead, I mounted a couple of the drawers to the steel tray extension. I used a bunch of old hard-drive magnets to just hold them on. I didn't test the weight limits. But I threw a bunch of hand tools in them, and everything seems fine.
Real-World Use
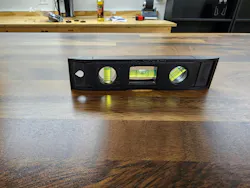
Have I actually used it, or am I just basking in the radiant glow of that saman wood? Both!
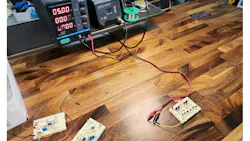
I've used it to assemble some breadboard projects. I assembled some 3D-printed parts for a cosplay project on it. I've used it as a surface to photograph products I made. I photographed some original art. I've used it to lay out items for auction photographs. Of course, I've used it to fix many household items and broken toys for my son.
To use the cliché, this workbench is a game-changer.
Everything I work on begins on that workbench.


Future Additions
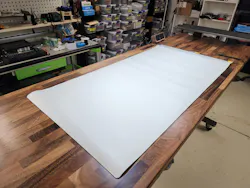
- One thing I would like to have for this workbench is an anti-static surface. I actually have one, but it's kind of small and rumply. I want one to match the aesthetic of the table itself. It'll occasionally cover up that gorgeous wood, so it better look awesome, too. Although not that important, it would be great if it were 80 × 30 inches, the full size of the table.
- I considered one of those dense, multilayer rubberized mats used on old drafting tables. But the permanence of it steals away from the look.
- I'm going to add a set of secondary controls on the other side of the bench. That way, I don't have to walk around to adjust. I'm just being lazy, yes. I still think it would be a cool mod.
- AC power distribution to the table, when I need it, is a challenge. I don't want to drag extension cords all around. I'm considering hanging AC outlets from the ceiling. That way, I can still roll the table around without issue.
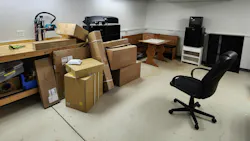
The office space that the table is in now is small. It's nice to roll it around, away, out the door, or whatever I want. But it stays in the relatively small space, 345 square feet. At my other workshop, the industrial space where all of my machines are located, I have about 3,000 square feet of open floor space. This workbench would rock there.
I'm really considering ordering a second one.
It spins so smooth. Those wheels were well worth it.
About the Author

Cabe Atwell
Technology Editor, Electronic Design
Cabe is a Technology Editor for Electronic Design.
Engineer, Machinist, Cartoonist, Maker, Writer. A graduate Electrical Engineer actively plying his expertise in the industry and at his company, Gunhead. When not designing/building, he creates a steady torrent of projects and content in the media world. Many of his projects and articles are online at element14 & SolidSmack, industry-focused work at EETimes & EDN, and offbeat articles at Make Magazine. Currently, you can find him hosting webinars and contributing to Electronic Design and Machine Design.
Cabe is an electrical engineer, design consultant and author with 25 years’ experience. His most recent book is “Essential 555 IC: Design, Configure, and Create Clever Circuits”
Cabe writes the Engineering Life & Engineering on Friday blog on Electronic Design.
See Cabe's cartoons & comic strips here.
Comment About the Article
To join the conversation, and become an exclusive member of Electronic Design, create an account today!

Leaders relevant to this article: