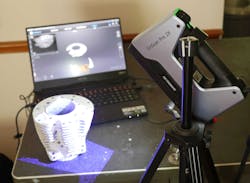
I recently bought a 3D scanner to complement the 3D printer I purchased to work on a motorcycle engine case redesign. The Einscan Pro 2X model I bought needs a Nvidia GTX video card to support its software (Fig. 1). The Nvidia Quaddro cards I have in my CAD workstations will not work. I wanted a dedicated laptop for this, so I purchased a GigaByte gamer-class laptop with a Nvidia GTX 1070 card—only one revision down from the fastest GTX 1080 video card, but about 1,000 dollars cheaper.
The Newegg description was “GIGABYTE Aero 15X v8-BK4K4P Thin Bezel 15.6" 4K/UHD GTX 1070 8 GB VRAM i7-8750H 16 GB Memory 512 GB PCIe SSD Windows 10 Pro 64-bit Gaming Laptop.” It cost $1,949.00 in late 2018. I got the scanner on eBay for $5,224.00 from a vendor that I now see only sells junk jewelry. I should have seen if my SolidWorks vendor offered this model and tried to get them to match the eBay price. You want support with things this difficult to use.
Good Scanners Cost a Lot
While $7,000 is a lot of money, there are far more expensive scanners that are even more accurate. The Einscan uses patterns of light to detect the objects, similar to the Artec scanners. The Artec scanners achieve 0.1-mm accuracy without the need for calibration plates or stickers, but they cost between $10k and $25k—too far out of my price range. At the other end of the spectrum are 100-dollar scanners that use the Microsoft Kinect game module. Newark/Element 14’s Ben Heck did a nice video trying to get a decent output out of one of those models:
I wanted a handheld scanner that could do something as large as a motorcycle exhaust system, so the many cheap 3D scanners that used a turntable for small items were not of interest to me. The Einscan product line occupied a niche with good resolution and a price, while high, was not heart-stopping.
Getting Started Scanning
I unpacked my new laptop and suffered with the despicable Windows 10. I have Win7 on all my machines, but I have to admit Win10 was not as infuriating as I feared. I got the Einscan software installed and plugged the scanner into a USB port. Lots of misery since the scanner software would only recognize the scanner if it first had power and I did a reboot on the laptop.
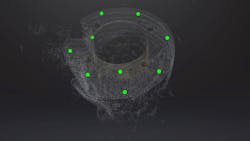
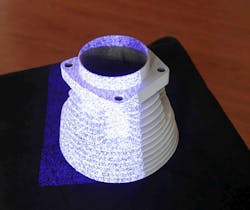
I tried and tried to scan a Harley cylinder I had handy. Of course, I did not read any instructions—that’s the American Way. I was very disappointed and, not being able to get anything, I just happened to wave the scanner past my shoe (Fig. 2). Miraculously, a pretty decent point cloud appeared.
This taught me two things. First, the scanner likes nice “monotonic” shapes like shoes and wizard figurines. These were work shoes that I had done painting and plastering in. The shoes were specked white and that gave the scanner enough reflections to sense the shape. That was the second lesson, my trying to scan a black cast-iron cylinder was a fool’s errand.
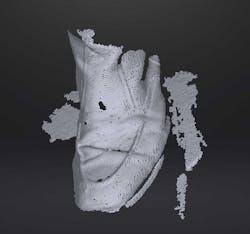
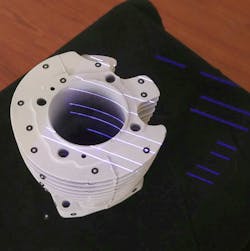
I then dragged over a DeWalt drill and scanned that in (Fig. 3). To do a fast scan without using little circular paper markers plastered on the part, you must go very slowly and methodically. The software is actually recognizing the shape of the item and using it to register the relationship between the new points it’s adding.
The Scanning Software
The Einscan software has one of those whizzy dumbed-down interfaces that remind me of a Speak-and-Spell toy (Fig. 4). It’s as silly as that “ribbon” menu Microsoft added to Word. You can’t switch between high-definition and rapid-scan modes easily; you have to start the project by deciding which you want.
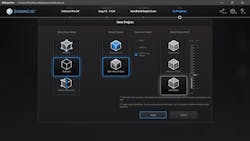
Once in the rapid-scan mode, the interface lets you choose whether to use markers or part features or both. It also lets you select a texture scan, in case you have the optional camera attachment, which paints a bitmap on the point cloud. You can either select the resolution or choose a mode that lets you specify the point-cloud resolution after the scan. “Classic” mode is 15fps (frames per second), and “Lightning” operation mode is 30fps. You can tell programmers are involved in the UI since they create artificial variable names that only they know the meaning of, rather than labeling the buttons “15fps” and “30fps.”
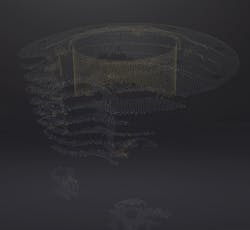
The rapid-scan mode paints what looks like 2D bar-codes over the object (Fig. 5). If the object has many distinguishing features, the scanner can keep its place. On areas with uniform appearance, like the right side of that cylinder, the software gets “lost.” Your only hope is to mess with distance to try and get some unique features in.
Though the HD mode provides greater resolution, it requires the use of markers so that the software can maintain registration. Instead of the bar-code like pattern, it uses several rows of light beams (Fig. 6). It’s intoxicating to watch the laptop screen and see the point cloud appear as you sweep the lights over the part.
This is where I learned you can add markers in the middle of a scan to help the software maintain registration. It takes a lot of markers. You must have enough of them to “turn the corners,” so to speak. Getting a scan of the top of the cylinder was easy. Where the software kept getting lost was when I would angle the scanner more level to scan the sides of the cylinder.
An Exasperating Scanning Experience
The Einscan user interface can be exasperating (Fig. 7). That little green bar on the left edge is telling you the scanner is at a good distance. If it runs up, it turns blue and you get a warning “Too far.” If the bars bounce down to the bottom, they turn red and you get a warning “Too close.” The nice thing is that you can see the light pattern on the part go into focus when you’re at the right distance, so that helps you keep the scan going.

When doing a rapid scan using the part’s features, this screen shows the most infuriating aspect of the software. That little green splotch of point cloud underneath the “Preview” light box is what the scanner is detecting. That’s what it has to pattern-match to when you start scanning.
Often, when you hit the “Play” triangle, either on this screen or on the scanner button itself, the scanner just seems to quit, and you get a “No Data” warning. Then the only way to get back into preview mode is to use the folder icon to reopen the whole project. You learn to get a really thick and rich point cloud in the preview mode, so that the software has something to “latch onto” as far as feature recognition.
Once you have that initial point cloud, the software is pretty amazing in that it can find that shape again if you go back to the exact same place. This is why it’s criminal that Einscan did not put a 1/4-20” tripod mount nut on the bottom, so you can fix it in place. It might be snazzy and glamorous to have a handheld scanner, but not after 10 or 20 times restarting the same project because you can’t get the scanner past its preview mode. If the scanner was fixed, it would let you move the part incrementally to add to the scan.
Losing Track
When you move too fast or the part has no unique features, you get the dreaded “Track Lost” warning (Fig. 8). Worse yet, the software plays this obnoxious calliope music that makes you want to toss the scanner at the laptop screen. I would rather have a white-noise hiss or a tone or anything else, but I guess I will have to figure out the volume setting on Win10, right after I find where they hid the Control Panel. I still can’t stop the keyboard backlight from shifting colors like some infantile toy.
It’s often the “big concept” usage that goes unspoken in documentation. All I needed was one paragraph that explained the Einscan software has a project file folder you create, and it stuffs a project file into it like .hd_prj or .rap_prj. When you hit the “stop” square icon, it generates a point cloud, letting you select the resolution; that is, the density of the point cloud if you’re using that Lightning + Refine mode (Fig. 9). Then you can save the scan as a point cloud; they have tiny little text at the bottom of the dialog box that gives the option of .asc or .p3 file. The program won’t let me select the .p3 format for some unknown secret reason.
You can also decide to just take a low-resolution point cloud to begin with (Fig. 10). What confused me was that bright green arrow in the “Mesh Model” box on the lower right of the screen. See, the programmers at Einscan have decided to have fun calculating a mesh of triangles from the point cloud, when they should just let me do that in SolidWorks. Once you do hit that “Mesh Model” check button, you get more choices. Then, when you hit the little floppy-disk save icon, it lets you save as an .stl file, along with a handful of other formats. It shows an .asc format—I’m not sure if that would overwrite a point-cloud .asc file with a mesh .asc file. I don’t have the patience to find out.
Getting into SolidWorks
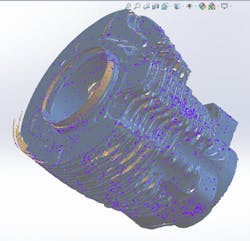
Getting an .stl mesh to get into SolidWorks had its own set of headaches. Because my file was so big, SolidWorks can only open the file as a graphical object (Fig. 11)—pretty much useless for doing anything with.
Knowing just how amazing SolidWorks is, I knew to look on the web, and learned about the ScanTo3D add-in that’s included in my Pro version, but not turned on by default. Using the tools>Add-ins menu pick, I turned it on, and activated it at startup. Check out the video on the ScanTo3D add-in:
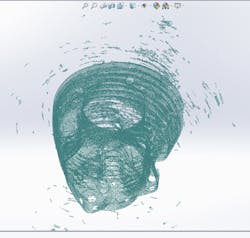
With ScanTo3D working, I then realized I wanted the .asc point cloud from the Einscan software (Fig. 12). After a while to figure out where the “next” arrow is in a SolidWorks wizard, I went through the steps, although SolidWorks seemed to crash a few times. That lost about a half-hour of “wizard time” for each occurrence, so I started bailing from the wizard with the green check icon, doing a save, and then just running past the beginning wizard stuff again. This was critical after SolidWorks lets you erase all of the noise and errant points. A save then protects all of the time and tedium of lassoing those little dogies.
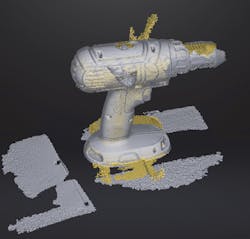
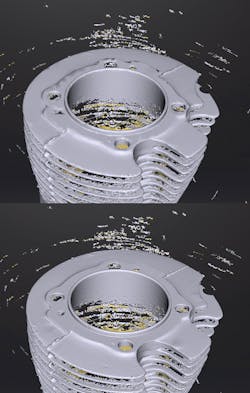
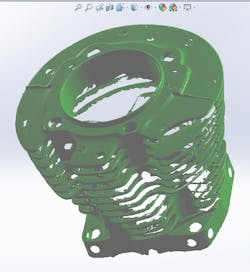
After SolidWorks goes through the wizard, you can then make surfaces from the points with yet another wizard. Instead, I stopped with the mesh, and that resulted in a workable structure (Fig. 13). You might laugh at calling that hole-ridden monstrosity workable. The thing is, you’re just using this as a guide to build real solid features, like 3D tracing. This mesh is pretty lame, but I can see getting better with the scanner and taking a full morning to do a scan that will result in a more monotonic closed form.
One thing I want to try is hanging the part from a ceiling fan with thin wires. Then mount the scanner on a tripod, and once it gets a decent preview, kick in the scan while slowly turning the part. Since the part is just hanging from three wires, once I get most of the features into the software, I can use the scanner in handheld mode to get the underside of parts and inside the cylinder. I also will experiment with tempura paints to get better reflection of the part, though the white ceiling paint I used this time worked pretty well.
Using the Section Command
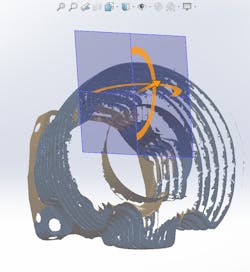
Once you get even a lame mesh in Solidworks, you can then use the Section command to slice it at various points (Fig. 14). Then you create a plane at the section line and do a sketch where you trace around the feature—in my case, the cylinder fin. Then you can extrude that as a fin or use normal modeling techniques. I do wonder about my alternative method, which is to buy a cylinder on eBay and saw it up at every fin. Then just lay the fins on a 100-dollar flatbed scanner and use the scans to trace over and make .dxf geometry in TurboCAD. I can then import the .dxf files into SolidWorks as a set of sketches. It sure would be cheaper than the 7,000 dollars for this setup.
The thing is, new stuff is always frustrating. I remember spending hours trying to optimize JPEG settings in GIMP. Then I got into video and it was days of playing with codecs and frame rates and all those things. I am sure this 3D scanning has a steep learning curve, but it’s like a video game that frustrates you continuously, only to occasionally give you some fantastic achievement that keeps you stuffing quarters into the game.
This cylinder digitization is a nice start, but my real need was scanning Harley cylinder heads so that I can figure out the arbitrary angle that the exhaust and intake ports come out at. I can see it will take a while, but the path to that goal is doable, and it might even be fun, especially if I bother to read the instructions.
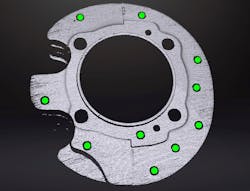
I do realize that scanning a deeply finned motorcycle cylinder was a very difficult objective. Yet when I scan the simpler parts of the cylinder (Fig. 15), I can see the awesome results that I might expect with more patience and understanding.
While I prefer the SolidWorks meshing algorithm, I note that the Einscan meshing code will automatically remove those green markers and pave them over with mesh. Those little joys will keep me playing with this technology for a long time.
About the Author

Paul Rako
Creative Director
Paul Rako is a creative director for Rako Studios. After attending GMI (now Kettering University) and the University of Michigan, he worked as an auto engineer in Detroit. He moved to Silicon Valley to start an engineering consulting company. After his share of startups and contract work, he became an apps engineer at National Semiconductor and a marketing maven at Analog Devices and Atmel. He also had a five-year stint at EDN magazine on the analog beat. His interests include politics, philosophy, motorcycles, and making music and videos. He has six Harley Sportsters, a studio full of musical instruments, a complete laboratory, and a video set at Tranquility Base, his home office in Sun City Center Florida.
Comment About the Article
To join the conversation, and become an exclusive member of Electronic Design, create an account today!

Leaders relevant to this article: