Designing Coupled Inductors
In the January issue of Power Electronics Technology, the operation and benefits of the coupled inductor multiphase (CIMP) topology were reviewed, and the equations for the output and phase-ripple currents were derived using a circuit model representation of the coupled inductor. In the circuit model, the coupled inductor is represented by a leakage inductance in each phase (LK), a magnetizing inductance (LM) and an ideal transformer with a 1-to-1 turns ratio (Fig. 1).
It was determined that the principle benefit of the CIMP topology was a significant reduction in phase-ripple current for a given transient response condition when compared to the uncoupled version of this topology. It was shown that this ripple reduction was dependant on the duty cycle (D), which is VOUT/VIN, and the coupling ratio, which is p = LM/LK. This reduction allows for improved efficiency or, conversely, one can improve the transient response using the CIMP topology and still maintain the same efficiency as in the uncoupled variety. It is clear that the CIMP topology relies on the design and implementation of the coupled inductor component. By leveraging the previous analysis, we can determine the relevant equations required to design and optimize the coupled inductor component.
The Coupled Inductor
Any inductor or transformer with multiple windings is a coupled inductor. Therefore, hundreds of implementations exist. However, in the vast majority of these implementations, with the notable exception of the common-mode choke, the driving source is only applied to the primary — or main — winding, and the other windings are simply “dumb” followers mimicking the behavior of the first.
Although, in theory, these devices could be used in a CIMP application, they would not work well. The trick is to determine how to design and optimize a part that has the required magnetizing and leakage inductances, appropriate saturation and thermal characteristics in a package size that is suitable to the application. To do this, it is necessary to first identify some possible core structures and their corresponding reluctance models, and then use the reluctance model in conjunction with the coupled inductor circuit model to realize a complete solution.
Although there is an infinite number of possible core structures for a coupled inductor, the toroid and E-core designs are two that immediately come to mind as shown in Figs. 2a and 2b. A reluctance model is the magnetic equivalent of an electric circuit model in which a magnetic force (analogous to voltage) drives a magnetic field or flux (analogous to current) through a reluctance path (analogous to resistance), and as such any electrical theorems or rules apply similarly.
The easiest way to determine a reluctance model for a coupled inductor is to remove one of the windings and then envision the various paths that magnetic flux could take to complete a closed loop back to the driving force (magnetic force from the remaining winding is equal to the number of turns times the driving current). Each flux path has an equivalent reluctance that is equal to the length of the flux path (lE) divided by the cross-sectional area of the path (AE) and the permeability of the material (µ), or R = lE / (AE × µ). The lower the reluctance for a given path, the greater the magnetic flux through that path will be.
Although it is possible to develop a model in which every flux path is identified, it is easier and just as accurate to identify the most likely paths and use these in the reluctance model. It is then possible to refine the model by adding the less likely paths back in, if desired. After identifying the most likely flux paths, the other winding is re-inserted into the reluctance model and the model is complete.
As can be seen in Fig. 2a, most of the flux Φ1 (red) created by the magnetic force, N × I1, travels through the high-permeability core (low reluctance), although there is some leakage flux that takes the shorter but higher reluctance path through the air. Although the flux leaks everywhere, all of these reluctance paths are in parallel and can be equated with a single path through the center of the core. The same effect happens with the flux Φ2 (yellow) from the N × I2 magnetic source. In Fig. 2b, intentional air gaps are inserted into the high-permeability core material to help direct the flux. Although there is flux that travels outside the core geometry, it is comparatively small and can be ignored.
As shown in Fig. 2c, although the structures in Figs. 2a and 2b are physically different, the reluctance model for each is the same. It can be assumed that the construction of the inductor is symmetrical and, therefore, the reluctances RA and RB are equal and can be replaced with R. For each of the identified structures, the values of reluctances R and RC will vary depending on the placement of the windings, the core material used, the size of any inserted air gaps and the physical size of the core. The trick now is to determine how reluctances R and RC from the reluctance model relate to the magnetizing inductance and the series leakage inductances LM and LK of the circuit model.
Equating Reluctance and Circuit Models
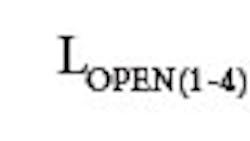
One approach to relate reluctances R and RC to the circuit elements LM and LK is to look at how one would actually measure the circuit elements (Fig. 3a), and how this measurement equates back to the reluctance model. The first and most obvious measurement to take on the inductor component is to measure the open-circuit inductance on each of the two windings. Fig. 3b makes it clear that the measured open-circuit inductance equals:
In regards to the reluctance model (Fig. 3c), the open circuit inductance measurement on only one winding is equivalent to removing or shorting the other source such that the equivalent circuit reduces to that shown in Fig. 3d. It is clear from this figure that the equivalent reluctance is equal to:
The second measurement on the inductor component could be to measure the short-circuit inductance by measuring the inductance on one winding with the other winding shorted. Assuming a perfect short, the short-circuit inductance equals:
This measurement is often used to measure the leakage inductance (LK) in transformer applications because it is assumed that LM >> LK. However, for the coupled inductor, this is not the case, and as such LSHORT does not lead to a clear or direct measurement of the leakage inductance. A better measurement is the reverse-series inductance, in which the windings of the inductor are tied in series but out of phase (Fig. 3e). In this measurement, the opposing polarity of the windings effectively cancels the magnetizing inductance (LM) and the series inductance equals:
In regards to the reluctance model, the reverse-series measurement is equivalent to putting the two windings in parallel, and the equivalent circuit reduces to that shown in Fig. 3f. It is clear from this figure that the equivalent reluctance is equal to:
Again, knowing that L = N2 / R and using Eqs. 5 and 6 yields:
And using Eq. 8 to solve Eq. 3 yields:
With the definition of LK and LM in terms of R and RC it would be possible now to design a coupled inductor. However, it would not be possible to determine if the inductor was going to saturate in an actual application without first determining the amount of flux in the various sections of the core. To determine this, we need to solve for the flux (Φ1, Φ2 and Φ3) in the reluctance model. The reluctance model (Fig. 3c) resembles the electrical circuit used in Millman's Theorem, and as such this theorem can be used to solve for the flux in each leg:
where I1 and I2 are the currents in phase one and phase two, respectively.
It can be seen that the expression RC / (R2 + 2RRC) in Eqs. 10 and 11 is similar to the definition of LM in Eq. 9, and it should be noted that the expression (R + RC) / (R2 + 2RRC) is similar to adding LM plus LK in Eq. 3. Substitution and noting that LM = p × LK yields:
Three things should be noted about these equations. First, the flux in the center of the reluctance model (Φ3) is not dependent on the coupling factor (p) or the imbalance between the currents in phases one and two (I1 and I2). Second, and most important, the flux in the outer legs of the reluctance model (Φ1 and Φ2) is very much dependent on the current imbalance as well as the coupling factor (p). As a result, high values of p (as p is increased, the phase ripple decreases but at a decreasing rate) actually destabilize the inductor and make it more susceptible to saturation caused by a current imbalance between phases; therefore, high p values should be avoided.
By substituting the phase current equations derived in the January 2006 article, Eqs. 13, 14 and 15 can be rewritten in terms of the peak flux (affecting saturation) and the ac flux (affecting core losses) as:
Note that the Φ3AC occurs at twice the switching frequency (FS), but that the flux in the outer legs Φ1AC and Φ2AC occurs at the switching frequency. Intuitively, this makes sense because the outer legs are only being driven once per cycle, whereas the center leg is being driven by both the N × I1 and N × I2 terms. In addition, note that the ac flux is not affected by the coupling ratio (p) or the actual value of LK as it is influenced entirely by the applied volt-µs in the application.
Uncoupled vs. Coupled Design
To get a feel for the tradeoffs between uncoupled and coupled inductor applications, it is helpful to run through an actual design comparison. A potential application for the CIMP topology would be in powering the processor for IMVP6 notebook computing applications. Although the electrical requirements vary, a standard specification is shown in the table.
Existing implementations use inductors similar to the Pulse PG0255.401NL (360 nH, 1 mΩ, 11.2 mm × 10 mm × 4 mm), and the electrical and mechanical specifications are shown in the table. For the sake of comparison, the design will seek to keep the same efficiency per phase (equal ΔIPHASE), but improve the transient response time by a factor of two (dI/dtMAXIMUM = 60 A/µs). This requires an LK of 0.5 × 360 nH or 180 nH. For consistency, we will assume that the 1 m is a necessary condition due to the use of inductor current sensing — sensing the current by measuring the voltage across the inductor resistance — and that the 4-mm maximum height is required for this notebook application.
Note that a patent on the coupled inductor multiphase topology has been granted to Volterra, and so it is my understanding that at the present time the coupled inductor multiphase topology can only be used with approval by or license from Volterra. The coupled inductor product defined previously was developed as a comparison and is not commercially available.
As can be seen in the table, the coupled inductor designed using the previous equations enables a 2x increase in the transient response without affecting the ripple current per phase. This performance improvement is accompanied by a reduction in total inductor footprint of more than 30% and a cost reduction of more than 35%. In addition, because the coupled inductor is made using a ferrite-core material, the core losses can be reduced by a total of 1.7 W, which represents a 2% to 3% increase in system efficiency.
Through simple analysis of the circuit and reluctance models, design equations for a two-phase coupled inductor have been derived. This analysis can be extended to higher phase counts. The proposed two-phase coupled inductor design for notebook applications showed that the CIMP topology can enable faster transient response, improved efficiency, smaller board space and reduced cost over the conventional two inductor noncoupled multiphase approach.
About the Author
Comment About the Article
To join the conversation, and become an exclusive member of Electronic Design, create an account today!

Leaders relevant to this article: