A New and Improved Home Lab Arrangement
I just made a major improvement in my lab bench by removing the instrument shelf. When I was a Silicon Valley consultant, I had a complete lab with a high-speed bench, fab area, and temperature chamber. The main bench had tens of thousands of dollars of equipment, and that’s at used-equipment prices.
I shed a few things after I stopped consulting. I really stripped things down when I decided to move to Florida. I sold a lot of equipment to help finance the move. Here in Florida, I set up a lab bench in the second bedroom (Fig. 1).
1. Initial lab bench setup
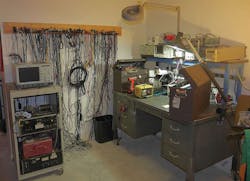
It used the same blue instrument shelf I used in the consulting business. Somehow the oscilloscope ended up on top of a 19-in. rack that had a Harley generator test setup that I built. I finally put up the cable caddies, which I bought five years ago. A lot of the wires were USB cables and other computer stuff.
The instrument shelf was too low to stack a couple instruments, and too high to let me easily use the instruments perched on it. After two and a half years, I got exasperated and fired up my TurboCAD mechanical-engineering 3D software (Fig. 2).

2. 3D model of proposed lab bench setup.
Setting it Up
I was going to put an 8-ft. sheet of plywood down on the surface so that I could cantilever the two Kennedy toolboxes on each side of the desk. You can still see the upright boards where I was trying to put up a shelf above the desk. After playing with the layout for an hour, it became evident that I really didn’t need a shelf. I could just stack the instruments on top of one another. I came up with an approximate solution with the drawing. It’s a lot easier to move stuff around on a computer screen.
Based on the 3D layout, I went into the lab and started moving instruments around to match the drawing. I made some changes, which I have since back-annotated to the drawing. With the LeCroy scope on the desk surface, the probes extended a little into the work area. I originally had the HP 8590A spectrum analyzer on top of the scope. I realized I hadn’t used the spectrum analyzer in seven years, so I put that off on the right side. Then I put the HP 8082A pulse generator underneath the scope so I could work under where the scope probe connections stick out.
The Outcome
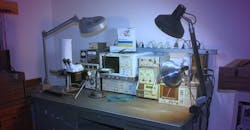
The final arrangement works really well (Fig. 3). On the left is a Wavetek signal generator with several power supplies stacked on top. In front of that is the Bausch & Lomb StereoZoom microscope. It’s handy there, since you can extend it over the work or swing it out of the way. There’s a dual-gooseneck illuminator behind the microscope. I found the microscope vertical bar is a great paper-towel holder.

3. New lab bench setup.
In the center is the HP (Keysight) 8082A pulse generator with the LeCroy LC684DXL scope stacked on top. There is a copy of National Instruments’ Signal Express and a Saleae Logic16 logic analyzer on top of the scope.
To the right of the scope is a Kikusui PLZ303W programmable load. Stacked on that are two Tektronix AM503A current probe amplifiers. On top of that is a Tektronix P6042 current probe, which has lower noise than the AM503 amplifiers.
At the far right is the HP (Keysight) 8590A spectrum analyzer. Atop that was a hand place to put a HOTweezer thermal wire stripper and a Metcal soldering iron with both a conventional and a tweezer iron.
The left-hand light has a fan to dissipate solder smoke. Modern electronics are tiny, so you need plenty of light to go with the microscope and that green headband magnifier on the desktop.
4. Looking at the back of the new setup, the Metcal soldering iron sits equal in height to the LeCroy scope.
A nice bit of serendipity, the height of a Metcal on top of the spectrum analyzer was precisely the same as the height of the LeCroy on top of the pulse generator (Fig. 4). The plug strip spans them nicely. I was going to tie the power cords off into bundles, but realized that if they draped behind the desk, I could pull out any instrument while power remained attached.
Desk Duty
There was a built-in desk made in the 1980s in the sun room of the house. It had to come out so I could paint the walls and lay ceramic tile. So I put casters on the bottoms of the two base units (Fig. 5). Where you see the gap there’s a wall socket. There’s supposed to be a place to sit in the middle, but I just cantilevered the top over the right side. It’s not screwed on; the two Kennedy toolboxes keep it in place. Yes, that’s a genuine Model 8450 Silver Beauty armature tester to the left of the toolboxes. Harley mechanics call it “the growler” for the noise it makes.

5. Toolboxes sit atop the retro desk fitted with casters.
The ancient secretarial desk is heavy steel and really strong. I put casters on it long ago. It has a typewriter shelf that pulls out and rises (Fig. 6). For now I am keeping my Panavises and some wire on it. As I use it I may find something better to have close at hand.
6. Old steel desk has a handy, pull-out typewriter shelf.
The top-right drawer has the trusty Fluke true-RMS voltmeter (Fig. 7). There’s Craftsman clamp-on ammeter as well. To the left of those is a Fluke dual thermocouple meter, a Fluke IR temperature probe, and a Tek A6303 100-Ampere probe for the AM503 amplifiers. And to the left of those are some IET decade boxes, both resistance and capacitance. Before Spice, we had decade boxes to dial-in circuits.
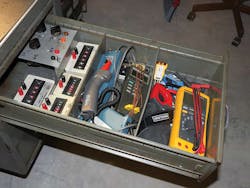
7. A Fluke voltmeter sits in top-right drawer of the steel desk.
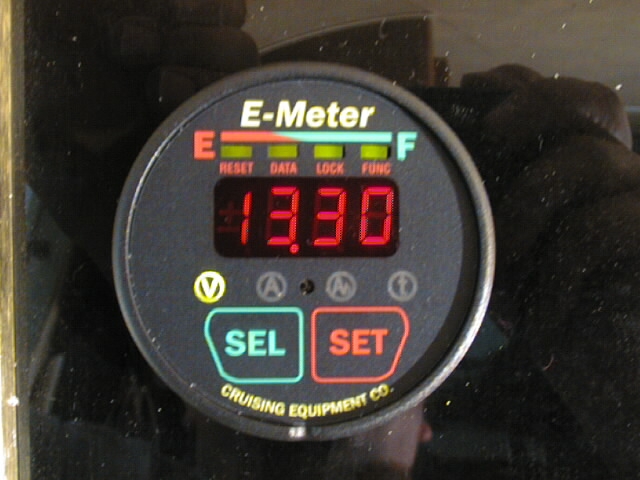
The middle drawer as a Kill-a-Watt power meter (Fig. 8) In addition, there’s a Watts-Up? power meter that also logs the readings so you can see them change over time. I still have the E-Meter I took out of my electric car conversion when I scrapped it. To the left of those are a bunch of transformers, battery chargers, and wall warts.
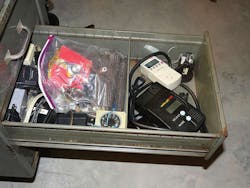
8. In the middle drawer are Kill-a-Watt and Watts-Up? power meters, among other devices and compoents.
The bottom drawer has a Tek P6015 high-voltage scope probe (Fig. 9). Moreover, there are two LeCroy AP020 active FET scope probes. To the left of those is a big bag full of BNC, banana, and other connectors. The little black box is a Snap-On ignition probe.

9. Probes and connectors occupy the bottom drawer.
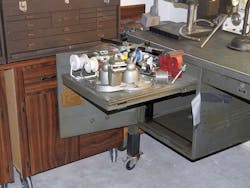
The center drawer has a bunch of screwdrivers that did not fit in the Kennedy tool box (Fig. 10). The pencil tray has some 50-Ω attenuators, some batteries, and some jacks and test lights for RCA connectors. A magnifying glass, some rulers, and scissors are sprinkled on top.
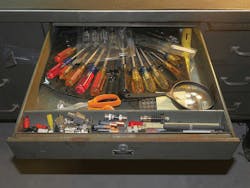
10. From screwdrivers to attenuators, the center drawer is a potpourri of components and tools.
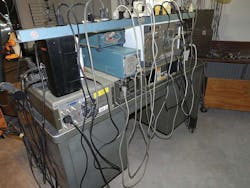
I still have the 19-in. rack with the generator test setup (Fig. 11). Best yet, I could take the desk drawer from that built-in desk and put it on top, with the aid of two 2×2-ft. sheets of plywood from Home Depot. I have my old mid-tower XP workstation tucked next to it, with the dual monitors on top. These are disconnected and I might sell them off on Craigslist or eBay. Note the bromochlorodifluoromethane fire extinguisher. I sure am not going spray dry chemicals on my circuits when they catch fire.
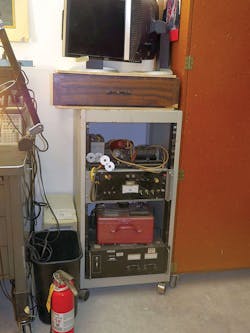
11. Test generator is set up in the 19-in. rack.
The old blue instrument shelf got used on the workbench (Fig. 12). It got stuff off the bench, giving me more room to work. Note the second HOTweezer on the right side. Behind the shelf is an original Wesley Willis pen drawing that I will have to move so that it’s visible. Being an engineer, this bench is in my living room. It’s handy, practical, and air-conditioned. I’m not going to work in the garage, which gets to 100ºF on many afternoons.

12. The old blue shelf finds a home on the workbench.
While going through all the stuff, I found five scope probes I don’t need. I listed them on eBay and three sold in an hour. I have over 100 dollars for my trouble and that just about pays for the plywood and casters. Let us know if you have a good lab-bench setup, or any advice in general on using and setting up a home lab.

About the Author

Paul Rako
Creative Director
Paul Rako is a creative director for Rako Studios. After attending GMI (now Kettering University) and the University of Michigan, he worked as an auto engineer in Detroit. He moved to Silicon Valley to start an engineering consulting company. After his share of startups and contract work, he became an apps engineer at National Semiconductor and a marketing maven at Analog Devices and Atmel. He also had a five-year stint at EDN magazine on the analog beat. His interests include politics, philosophy, motorcycles, and making music and videos. He has six Harley Sportsters, a studio full of musical instruments, a complete laboratory, and a video set at Tranquility Base, his home office in Sun City Center Florida.
Comment About the Article
To join the conversation, and become an exclusive member of Electronic Design, create an account today!

Leaders relevant to this article: