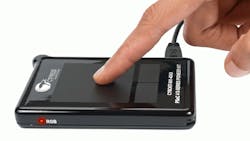
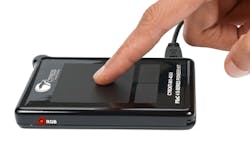
Cypress Semiconductor’s CY8CKit-041-40XX PSoC 4 S-Series Pioneer Kit (Fig. 1) showed up the other day. It comes in a nice little plastic box with a multicolor LED and a CapSense capacitive touchpad. It is built around Cypress’ EZ-BLE ProC module based on a PSoC 4 with BLE (Bluetooth low energy) support.
The kit works right out of the box with a preprogrammed demo that uses the touchscreen to control the LED. The version I have includes an overlay with a multicolor chart. Touch a particular color on the chart and the LED changes color. There are two areas to increase or decrease the intensity.
What is impressive about the kit is that it has such a clean design while providing an extensible development environment. The module is designed to be portable with an on-board battery, so the system is self-contained. The development tools were downloaded from Cypress’ website, including the PSoC Creator IDE. The application source code is also available, so it can be extended. Most other development or evaluation kits typically include only the board, which may be fine for many applications, but portability is often a requirement for an Internet of Things (IoT) application. This kit provides a way to get started quickly.
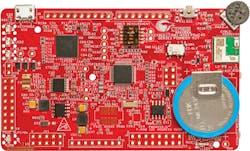
Inside the box is the PSoC 4 S-Series Pioneer board (Fig. 2), also available separately. The board is based on a Cortex-M0+ PSoC 4000S with 32 Kbytes of flash memory and 4 Kbytes of RAM. It also has six programmable analog blocks and seven programmable digital blocks. The 36 GPIOs are CapSense-capable. The CapSense technology is water-tolerant and supports proximity sensing. There are 16 Smart I/O pins, as well.
The PSoC analog and digital programmable blocks are what set this apart from other IoT platforms that tend to have dedicated analog or digital peripherals. It allows a PSoC chip to handle many interface chores without the need for extra circuitry. It can also significantly offload the Cortex-M0+, allowing reduced power consumption or to deliver better application performance.
The board has a few extras like the BLE module and a 1 Mbit FRAM memory. FRAM is handy because it does not suffer from the write limitations of flash, plus it is fast and power-efficient. These can be critical in mobile IoT applications where fast power on/off cycles are important.
Another PSoC is on the board to facilitate programming and debugging in addition to the BLE module. There is a serial connection between the two microprocessors.
There are some switches, a potentiometer, and Arduino-compatible headers. These are a bit hard to use when the case is closed unless a tiny device is hardwired to the I/O pins. It might be possible to add a single chip 3- or 6-axis sensor with some careful soldering and wires. The Arduino support does allow the case to be removed and headers added, along with Arduino-compatible shields. The touchpad can be retained since it is on the bottom of the board, although the headers and a shield add significant Z height to the package.
The BLE module offloads the host Bluetooth communication chores, greatly simplifying any wireless interaction. The module has its own antenna and crystals and is available separately.
Changing the built-in functionality was relatively easy. The Windows-based PSoC Creator IDE is easy to use, and there are more than 120 pre-verified PSoC components. These are used to configure the analog and digital blocks. More ambitious programmers can use Verilog or a custom state machine tool to create new components or modify existing ones. For example, one digital component is an I2C interface. Using standard components is a drag-and-drop operation. I opted for this, as creation of a customized peripheral takes a bit more time and effort, and I didn’t have a need at this point for something that was not already in the predefined component list.
Development is pretty painless. The debugger is well integrated and the component selection incorporates header files, simplifying the programming interface once the hardware has been configured. The IDE supports the family of PSoC devices, along with more advanced debugging features and probes, but these are not suitable for use with this board.
If the PSoC 4000S is a suitable platform for your application, then this kit is a very good way to start. It is very configurable and extensible. I found it very easy to quickly move from evaluating the sample application to creating one of my own.
About the Author
William G. Wong
Senior Content Director - Electronic Design and Microwaves & RF
I am Editor of Electronic Design focusing on embedded, software, and systems. As Senior Content Director, I also manage Microwaves & RF and I work with a great team of editors to provide engineers, programmers, developers and technical managers with interesting and useful articles and videos on a regular basis. Check out our free newsletters to see the latest content.
You can send press releases for new products for possible coverage on the website. I am also interested in receiving contributed articles for publishing on our website. Use our template and send to me along with a signed release form.
Check out my blog, AltEmbedded on Electronic Design, as well as his latest articles on this site that are listed below.
You can visit my social media via these links:
- AltEmbedded on Electronic Design
- Bill Wong on Facebook
- @AltEmbedded on Twitter
- Bill Wong on LinkedIn
I earned a Bachelor of Electrical Engineering at the Georgia Institute of Technology and a Masters in Computer Science from Rutgers University. I still do a bit of programming using everything from C and C++ to Rust and Ada/SPARK. I do a bit of PHP programming for Drupal websites. I have posted a few Drupal modules.
I still get a hand on software and electronic hardware. Some of this can be found on our Kit Close-Up video series. You can also see me on many of our TechXchange Talk videos. I am interested in a range of projects from robotics to artificial intelligence.


