The Benefits of CT Technology in Non-Destructive Test
What you’ll learn:
- How the scanner divided the battery into several 3D elements.
- How the accompanying software created a color map of the pin cylinder in the battery.
In our everyday lives, we often fail to notice the little things that help us go about our day without interruptions. One of these is batteries. Batteries supply power to a variety of objects, from a remote-controlled toy car to a pacemaker or surgical power tool. We all know what a battery looks like on the outside. What if we could obtain an inside look? Even though this isn’t a new idea, the method used to “see” inside a part was different.
Destructive testing forces the material to fail under various load factors. The method determines the point of failure of the material. This test is carried out under severe operational circumstances, and conditions are continual till the material breaks. Not only is destructive testing expensive, but it also means the part is considered a total loss because it can no longer be used. CT technology provides a better alternative.
Computed tomography (CT), also referred to as an industrial X-ray and industrial imaging, is an X-ray methodology yielding 3D results by placing an object on a rotational stage between an X-ray tube and an X-ray detector, rotating the object 360 degrees and capturing images at specific intervals. Thus, a CT scan uses computer-processed combinations of several X-ray images taken from different angles to produce cross-sectional (tomographic) images or “virtual slices” of specific areas of a scanned object.
This technology offers several benefits when looking inside a battery—it’s the only way to obtain 3D images, takes very little time to capture data and troubleshoot, and, of course, is less dangerous than destructive testing. True dimensional data can be obtained without cutting or damaging the battery.
A Peek Inside
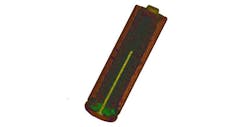
Curious to obtain a detailed look, Exact Metrology: A Division of In-Place Machining Company, used CT to accomplish the task. Hayden Lee, applications engineer, separated the battery into several 3D elements. He was able to obtain several different types of measurements in different portions of the battery, as well as extract several battery elements such as pin, separator wall, and case.
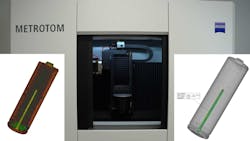
This was accomplished using the ZEISS METROTOM 6 scout, formally known as a GOM CT. Extremely high resolution and high precision, thanks to a 3k X-ray detector (3008 x 2512 pixels) and mathematical modeling of the measuring room, respectively, permit the METROTOM 6 scout to digitize complex parts including the internal geometries at the finest level of detail. Users obtain a complete 3D image for GD&T analysis or nominal-actual comparisons (Fig. 1).
Offering better safety and protection, the scanner is an enclosed tested cabinet with safety interlocks used to protect users or bystanders from X-ray radiation.
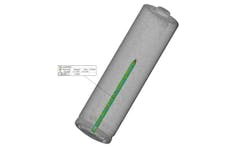
Using GOM Inspect, a color map of the pin cylinder inside the battery also was created (Fig. 2). The software analyzes 3D measuring data from fringe projections or laser scanners, CMMs, and other measuring systems. The software is employed in product development, quality control, and production. Production lines can always be optimized for speed, but additional scans are needed to obtain more data.
Hayden spent approximately two hours scanning and inspecting the battery and believes that this process could be almost entirely automated.
About the Author
Hayden Lee
Applications Engineer, Exact Metrology
Hayden Lee is an Applications Engineer specializing in CT scanning at Exact Metrology.
Voice Your Opinion!
To join the conversation, and become an exclusive member of Electronic Design, create an account today!

Leaders relevant to this article:


